Excess of anything is bad… Excess of fertilizer is worse…

I am sure this thought might have crossed your mind several times while fertilizing your plants and unknowingly this could have happened. It’s not your fault. Plants need nutrients to survive and grow and whenever it comes to potted plants they don’t get these nutrients naturally. Soil present on land or in the ground gets replenished with nutrients due to microbial activities, rain water and decomposition of biodegradable compounds as it forms an ecosystem. But this ecosystem is absent in potted plants. So, we need to fertilize them regularly with essential nutrients.

Am I over-fertilizing the plants? Let’s learn about some signs plants are giving us if they are.

Formation of a thin crust or layer on the top soil – If you observe some whitish layer formed on the surface of the soil or some sort of hard crust deposited on the surface, your plant is probably not absorbing the fertilizer due to overdose. This accumulation can attract disease causing microbes and insects and can hamper the normal growth and development of plants.

Why are the leaves on my plant turning yellow?

If you are constantly fertilizing and watering but still, the leaves of your plants are turning yellow, then it is probably due to overfertilization. This could also happen due to lack of proper light, if that is the case then keep your plant in proper light and observe.

Why are my plant shedding young leaves?

If your plants are growing new leaves but they are unable to fully develop or complete their life cycle and fall very early, the reason must be overfertilization only.

Why my plants are lacking beautiful flowers?

So, when the time for a bloom has arrived and still your plants are showing no signs of blossoms, try to turn down the dose of fertilizers a little bit.

The other plants are growing but not this particular plant!

Sometimes you could overfertilize one plant and perfectly fertilize the other ones. This could lead to stunted growth in the plant with excess fertilizers.

Roots are not of the normal colour, why?

Generally, the roots of plants are creamish or off white in colour. Due to overfertilization they can turn brown and lack proper growth. Improper development of roots will hinder the absorption of water and minerals and cause other problems too. The plants will have stunted growth, it will lack nutrients and can even die!

Help!! The leaves of my plant are burning from the edges!

If your plant is getting sufficient water and is away from direct sunlight, still the leaves are burning from the margins and turning brown, then you have to control the dosage of fertilizer for that plant. Due to excess fertilizer, plants are unable to absorb a sufficient amount of water which leads to the browning of leaves from tips and margins.

Always remember, all the above-mentioned symptoms can occur due to a single problem or a combination of different factors which lead to this. Try and observe your plant carefully whenever this happens. Provide them with good care, good light and water and keep an eye on the dosage of fertilizers. Do a little experiment and try to find out if overfertilization is the only cause of all these symptoms and you will surely be able to save your beloved plants.

Be careful as an excess of anything is bad, and an excess of fertilizers is worse for plants!

Written by
Antra Thada

Pro tip by Reema: If you’re absolutely clueless about the quantity of fertilizer, always under-fertilize. Under fertilization has very limited consequences and you can fertilize again whenever you feel the plant has properly absorbed all the nutrients and now needs more.

Let’s learn to grow mosses at home

Mosses are pretty hardy crops which grow without any fertilizer. All they need is a little care in the initial period of growth and they will grow perfectly. Here are a few tips for you to cultivate them in your homes.

Where to grow?

Mosses prefer shade and high humidity. So make sure you keep them in a shady place where plenty of moisture is available. Direct sun may lead to drying out of mosses. Acidic soil with a pH between 5.5 – 7 is best for their development.

Transplanting in soil

To grow them in soil, first you need to rake up the ground and create shallow thin lanes. The textured soil can make better contact with mosses. The next step is to water the area of transplanting and leave it for a couple of hours. Once the water is soaked in press the moss mat on the surface and mist the plant. Keep the plant moist for the next few weeks and soon it will grasp upon the surface to proliferate.

Transplanting on rocks or bricks

moss on stone wall.

It is a little tricky to grow moss on a solid surface as it takes time for the roots to penetrate. You can grow moss on a rock using slurry. Slurry can be made by chopping moss into smaller parts and mixing it with butter milk or yoghurt. If you wish, give the slurry a spin in a blender to mix it well. After this, you need to give birth to the painter inside you. Take a paintbrush and paint the slurry on the rocks or you can even pour it directly. Make sure that the slurry is not too liquid otherwise it will not stay in place. Keep on misting the moss till it has established itself.

Transplanting in containers

Terracotta or concrete shallow pots works best with mosses as they keep the soil cool but you can even opt for a plastic container. All you need to do is to form a dome like structure with the soil, moisten it and press the mat of moss on top of it. Keep the plant moist and in shade or indirect sunlight to establish it better. Grow you own luxurious carpets of mosses at any place you like and enjoy the lush green colours of mosses in your home.

Time to cool down the summer heat with mosses! Hear of them? Let’s find out if they really are that good infact!

If you have ever walked or hiked through a dense forest especially during monsoon season, you must have seen green mat like structures in the floor of the forest or on trunk of trees. Even while travelling through these jungles we have seen such sites but misinterpreted it as fungus. Well, it’s not fungus but Moss..!!

What are mosses?

They are small, non – vascular, flowerless plants. Non vascular plants do not have veins for transport of water and food, instead they are absorbed directly through the cells. They appear like dense green mats or clumps and belongs to the group of Bryophyta. They have individual leaves which are attached to a small stem.

Are mosses good for your garden?

They are in fact very good and useful for your home garden.  First of all, they will give an excellent green appearance to your garden which will make it feel fuller of life. Secondly, they absorb carbon dioxide in huge amounts. As compared to any other plant or any medium sized tree, mosses absorb CO2 and also retains moisture. They also break solid substrates or stubbles and release nutrients out of them. The nutrients can be utilised by rest of the plants in your garden.

What are the use of mosses?

Besides being used for decorative purposes in garden, mosses have been used traditionally by humans as a food packaging material, insulation of houses or making flower bouquets. Sphagnum moss can even be used as fuel.

Are mosses harmful?

The straight and simple answer is – NO! Mosses are not at all harmful and won’t destroy your home or walls where they are growing. (It is still recommended that you use a substrate rather than growing them directly on walls. All about how to grow mosses, best ways, tips, techniques and requirements are covered in the following post). You can also use them to cover ground.

Mosses for air purification

This is the most important point that I want to share with you. Besides absorbing carbon dioxide, mosses release good amount of oxygen also. And the best part, they absorb all the pollutants and dust particles in their vicinity which makes the air quality around them much superior. What could be better than having a natural air purifier in your home? To conclude, if you have mosses growing around your garden or house, don’t worry and let one of the oldest type of plants make your air pure and fresh. After all, the earth is their home since last 500 million years!

Written by
Antra Thada

Nothing more cooling than Gourds! This summer beat the heat with Gourds!

Gourds are wonderful plants that can be grown in tropical countries like India. They are easy to cultivate and come in various shapes, sizes, and flavours that are beneficial for us. Let’s learn how to grow these amazing vegetables on our balcony.

Materials required

  1. Containers –

Most of these veggies will flourish well in a 10 – 12 inches deep container. Since they are vines or climber types of plants, the diameter of the container can be kept around 3 to 5 inches to save space. You can choose metal, plastic or clay containers but clay pots are best as they prevent waterlogging conditions for your plants. Drainage holes are really essential. In case of pointed gourds, you may require a little bigger pot of 16 to 20 inches.

  • Soil –

Gourds require light loamy soil which is porous and well-drained. They don’t like waterlogged conditions, hence heavy soils which tend to waterlog should be avoided. You can mix red loamy soil with lots of organic manure/ FYM or vermicompost for fulfilling the nutritional requirements of plants. Some gourds like Ivy gourds can be grown in heavy soil too. If light red loamy soil is unavailable at your location, you can opt for clayey soil but only after mixing loads of compost to make it light.

  • Support for plants

Since the plants are climbers, they would definitely require some support to grow. You can build a wooden trellis for their support. For this, the wooden sticks should be placed in an inverted ‘V’ shape and should be 6 – 8 feet tall. Alternatively, if you have a cage-like structure or have high railings, you can direct the plants in that direction too. If you can’t arrange any of that, you can stick a short pole and tie a really strong thread up to the ceiling and let the plants climb through that thread.  

Light –

Gourds are mostly summer or rainy season crops, so they will flourish well in full sunlight. If you live in extremely hot climates then you can opt for partial shade or some sort of green net for protection.

Water –

In the initial days of growth, water the plants twice or thrice a week, when they start to flower you can water them every alternate day. Make sure that water does not log.

Pollination –

One of the most important activities as a gourd plant cultivator you would need to perform is, pollination. Plants of this family are highly cross pollinated as male and female parts are produced on different flowers or different plants. So, you can’t grow a single plant and expect it to fruit as pollination won’t occur without aid. Since we are growing these on a balcony, insects will rarely visit to pollinate. Hence, we need to take control of this and hand pollinate the flowers. You simply need to take pollen from a male flower and dust them on the stigma of the female flower. By looking at the bottom of the flower, you can identify its sex, if it has a gourd like structure then it is a female otherwise the flower is male.

When to pollinate?

Usually, the flowers open for like a day or two. This means we need to move quickly and keep an eye on the flowers. Once the flowers open, you can pick the male flower and pollinate it. This process is best performed during evening hours.

Sowing method –

Mostly gourds are best planted with the help of seeds. Directly sow the seeds in the final container as they won’t be able to withstand transplanting. You can soak the seeds overnight before sowing, but even if you don’t, they will germinate pretty well. After sowing water the seeds lightly.

Which gourds can be grown in pots or on a balcony?

  • Bottle gourd
  • Sponge gourd
  • Apple gourd
  • Bitter gourd
  • Pointed gourd
  • Ridge gourd
  • Snake gourd
  • Spine gourd
  • Cucumber

So enjoy the season of summers by growing your own veggies in a small compact space too. Gourds are perfect for beginners as they don’t require much attention and will make use of your home’s vertical space too.

Happy gourd summer!

Written by
Antra Thada

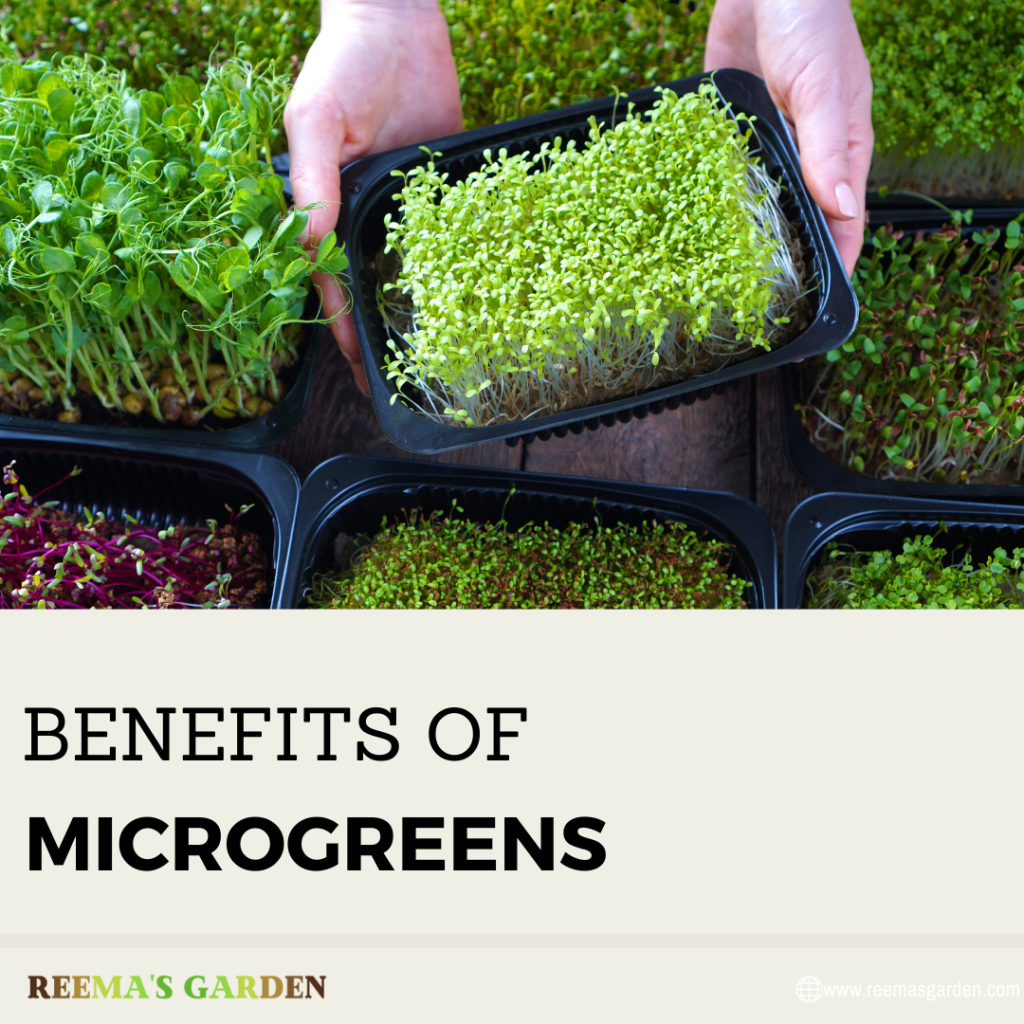
Microgreens

‘Chota packet, bada dhamaka!!’ I am quite sure you must have heard this saying many times in your life. Well, microgreens have proven it true. These little packets of food are definitely a blast of nutrients for you. To put it simply – Microgreens are tiny versions of adult plants that we eat. They are 2 or 3 leaf staged plants that are harvested for consumption.

Why should we consume them?

We can’t consume seeds of certain pulses like chickpea or green gram so we sprout them in water. This activates the enzymes which synthesize essential nutrients and proteins for the plant which is useful for us too. Now there is a limit to the different seeds which can be consumed as sprouts but in case of microgreens, almost all useful pulses, salad greens and vegetables can be grown and consumed. Now isn’t this amazing?

Sowing seeds also does the same thing more or less. It activates the enzymes which synthesize various minerals and vitamins. When the plant is in younger stage, the nutrients are concentrated and more readily available as compared to a fully mature plant.

Nutritional profile

It varies from plant to plant but in general microgreens contain – vitamin A, C, E, B complex, proteins, dietary fibre, folate, niacin, riboflavin, thiamine, sodium, potassium, calcium, copper, iron, magnesium, manganese and zinc. Some of them have anti-cancer properties and are very good for your heart and eyes. And of course, they are perfect for your weight loss regimes.

How to grow them?

They are very easy to grow. You can plant them in a tray, in pots, in garden soil or even in hydroponics system. They need a good bright sunlight and moist soil to grow properly.

Here is a list of plants that can be eaten as microgreens

  • Radish greens
  • Watercress
  • Mizuna
  • Peas
  • Cabbage
  • Basil
  • Lettuce (any)
  • Mustard
  • Kale
  • Endive
  • Arugula
  • Beet greens
  • Spinach
  • Tatsoi

And don’t stop at this list, conduct a little experiment and grow microgreens of your choice.

Harvesting

Microgreens can be harvested with the help of scissors or pluck the plant directly out of the soil. The right time to harvest them is at 2 – 3 leaf stage or when they are 1 – 3 inches tall.

Microgreens are not seasonal and can be grown in a little space. They are a good source of essential nutrients for your body. So pick up your gardening tools and prepare a tiny garden of microgreens for yourself.

Written by
Antra Thada

Cultivation of gorgeous and sacred flower – The Lotus

Almost everyone is fascinated by the glorious flower of lotus. It has a sense of royalty that attracts the eyes of every passerby and the colours are mesmerizing at the same time. And having them in your backyard or in your home is going to be super exciting and delightful. Growing this sacred flower can be a little tricky. But once you master the art of growing them, there is no turning back. Let’s learn some simple methods to successfully cultivate lotuses.

Planting lotuses with seeds require some attention. Let me tell you a fascinating fact, the seeds of lotus are one of the longest living seeds of plant kingdom. Due to their seed dormancy, they can live anywhere between 200 to 1300 years!

  • So, one needs to deactivate the mechanisms of dormancy in order to germinate the seeds. The seed coat of lotus is very tough which doesn’t allow water to gets absorbed. All you need is to rub the seeds on a sand paper or any rough surface. Even concrete will work! Rub the seeds till a white layer is exposed and black part disappears.
  • After that you need to place the seeds inside a glass container filled with water. You can also use some other containers but make sure to remove any seed which is rotting otherwise it will kill the whole bunch!
  • After a period of 4 to 7 days, you will be able to see the seeds sprouting. They will start to grow and in 2- 4 weeks, the very first set of leaves will appear.
  • The water in the container should be clean and should be free of dust particles. If you feel like it has become muddy or something, change the water. You should keep these glass containers in shade most of the time.
  • As the leaves emerge, it is now time to shift them into large containers. The container should be deep (around 12 to 16 inches), otherwise the leaves of plants will start to jump out and scatter themselves. You can choose the diameter as per as the availability of space in your home or in your pond but it should have a minimum diameter of 20 to 24 inches. Drainage holes should not be present.
  • Layer the container at the bottom with 1 to 2 inches of light sand. The second layer is formed by adding 3 to 4 inches of clayey soil. Alternatively, you can skip the sand and only layer the container with heavy clayey soil. Light soil particles will start to float and make the soil muddy so it is better to keep them in bottom as they are also necessary for aeration.
  • If you are planting using tubers, keep the pointy heads towards the surface and carefully place them. Similarly, the saplings must be placed with care. Do not bury them deep, try to keep them on the surface.
  • Lastly, water the plants daily. Make sure the soil is moist at all times otherwise the plants will fail to grow. One important thing to care about is the temperature of water. Lotuses love a warm water bath not a cold one. Try to use water with a room temperature or in winters you can even heat it up a little. In summers the sun will take care of the temperature.
  • After the stems have grown enough, if you have a pond or an artificial large water body, you can shift these plants along with the container as they will be easy to manage and fertilize.
  • Lotus flowers need a full bright sun for 6 to 8 hours every day to bloom.
  • As the leaves grow in size, you can increase the water content of the container till the leaves are flat and floating. Try and keep the water level same especially in summers.
  • With time you will observe that the plants have started to develop aerial leaves which are above the floating ones and have a longer stem. After that, it’s only a matter of time and you will be able to witness the grand event of a lotus blooming in front of your eyes.

P.S. – You would need to wait a year or two before seeing this, but don’t let this stop you!

Written by
Antra Thada

How to grow water lilies at home?

Each one of us is obsessed with different kind of plants and flowers. And why shouldn’t we? After all they are so fascinating, colourful and have so many different variations. One such variation is that plants can grow both on land and in water. What could be better than having some beautiful flowers floating in pond in your Garden? Water lilies are pretty easy to grow and look magnificent and soothing to the eyes. So, let’s learn how to grow them.

Location

The first and foremost thing to do is to choose where you are going to place these flowers. You can make a small pond in your garden or you can use beautiful water containers to grow them indoors. Make sure that they get a sunlight of 6 to 8 hours.

Container

This is very important for growing aquatic plants successfully. Choose a container which is atleast 16 to 18 inches in diameter and 10 to 12 inches deep. Drainage holes are optional.

Soil

Well, even aquatic plants need a substrate or soil to grow upon. Fill 3/4th of the container with clayey soil along with some slow releasing fertilizers. Slow releasing fertilizers release small amounts of nutrients in specific intervals which will help in nourishing your plants and will also avoid any fungal or microbials infestations. Then add some large stones and small pebbles, leave some space for sowing seeds.

Planting time

Flowers usually blossom during spring season and so do lilies. In that scenario it is best to plant them during February and March.

Sowing the lilies

After all these preparations, it is now to time to sow the seeds. You can get some tubers or some plantlets of lilies for this purpose. If you get tubers, plant them by keeping the pointy tip upwards and towards the center of the container at 45-degree angle. Remove any kind of old thick roots or leaves from the tubers if present. If you feel your container is too deep, take a small pot and plant your tubers in it so that the tips remain near the surface.

Add water

As we know it is an aquatic plant, water is must. After completing all the steps that are mentioned above, fill your container with water upto the brim. If you feel the water in your area is hard, it is better to use filtered water as lilies don’t survive in hard water.

Which type of lily is best suited for India?

There are two types of lilies available – one is tropical and another one is hardy. Hardy ones are good for places where temperature is freezing or it gets too cold like in mountains. For rest of the country, tropical lilies work best. They are available in amazingly attractive colours and can be found in local nurseries. When you buy a lily make sure its crown is healthy and in good shape.

Care and maintenance

One of the major problems these plants encounter is mosquitoes. As water is stagnant then it is but natural that mosquitoes will breed in it. So, to avoid this, you can add some fishes (like guppies) in your small ponds or containers. You also need to add some fertilizers like DAP in an interval of 3 to 4 months if you are not using organic slow releasing fertilizers.

Once you get used to seeing these beauties bloom and blossom, there is no turning back. They are super attractive and will make you feel happy and full of joy at the same time. Trust me, planting lilies will give you the best adrenaline rush as a plant parent.

Happy water lily gardening folks!

Written by
Antra Thada

If you see these symptoms, that means your plants need immediate help

There are times when the climate is not in our favour or we have consumed something that made us sick. Similarly our plants can also fall sick due to environmental or nutritional problems. The only difference is that we can speak and ask for help, but our plants don’t have the ability to do that. We need to understand the signs that they are displaying to understand that they are in stress. Let’s have a look at some of the symptoms that suggest that our plants need help.

Wilting –

When the plants are loosing water more than they can absorb, they start to loose rigidity. The leaves will start to fall and droop. The stem will eventually become saggy and plant will not be able to stand erect.

In such a situation you should keep the plant in shade and water regularly. This symptom can be due to a fungal or bacterial infection. If symptoms don’t improve then try some antibiotics or antifungal medicines.

Yellowing of leaves –

If the leaves of your plant start to change colour to yellow or they start to fade, it could be a sign of nutrient deficiency, poor drainage, damaged roots, compacted roots or high soil pH.

The remedy for this is to provide your plants with good fertilizers with macro as well as micro nutrients, maintain proper drainage and add some sulphur containing substance/fertilizer to lower the pH.

Rotted smell, sponginess and wilting of plants –

The reason for a rotten smell is mostly waterlogging. Over watering your plants may lead to this condition. This will kill the roots of the plants and they won’t be able to absorb water and show the same symptoms as wilting. The leaves will also start to turn yellow.

In such a situation, remove the excess water and make sure that the soil is well drained and porous. Oxygen should reach the roots. Keep the plant in indirect bright light to evaporate excess water. Look out for your plants regularly. If you feel like any of the plant is showing any abnormality, it can be caught in an early stage and can be rectified. Ignorance can lead to damage beyond repair. So what if the plants can’t talk? We as gardeners or plant parents can try and hear the unsaid things also!

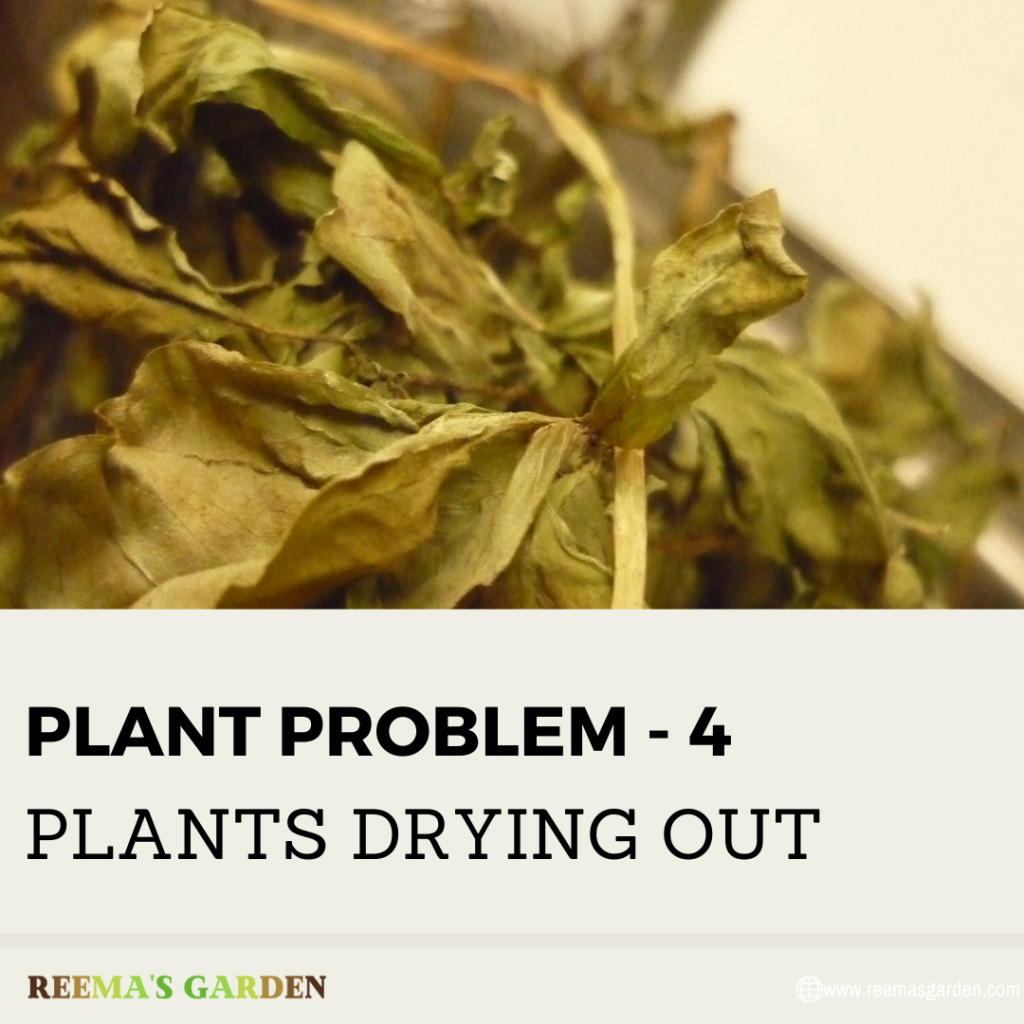
Plants drying out –

This can happen if you forget to water your plant regularly. The leaves will start to scorch and fall after drying out and if it continues then the whole plant will shrivel and dry.

If this happens with you then provide the plant with adequate water at regular intervals. Move the plant away from direct sunlight to a place where it can retain moisture for a longer duration. Lack of water may also lead to depletion of nutrients. So it is advisable to supplement it with some fertilizers or compost.

Hope this helps!

Happy Gardening!

Written by
Antra Thada

Mushrooms in pots? Really? Is that even possible? Let’s find out…

Mushrooms are becoming increasingly popular in our day to day lives. But did you know that you can use them house plants too!! Boy, wouldn’t that be a beautiful sight? Mesmerizingly beautiful colorful mushrooms in pots!! Kindly note that this post talks about mushrooms for ornamental purposes only. These mushrooms are not meant for consumption. Do not, I repeat, do not ingest or consume any part of these mushrooms. These mushrooms are particularly chosen keeping in mind their beautiful colors and easy to grow ability.

What exactly are mushrooms?

Mushrooms are actually fungi. Yes, you heard that right! Fungi are beautiful organisms which develop attractive fruiting bodies known as mushrooms. They are not exactly plants because they cannot synthesize their own food but they are plantlike. Note that not all mushrooms are edible. The main part of mushroom is mycelium which is a network of delicate fibers present below the surface of soil. What we see with our eyes is the ‘Thallus’. Thalli comes in various sizes, shapes and colours. This is what makes the mushrooms unique.

Mushrooms for gardens

These group of fungi display beautiful colors which would be perfect to add vibrant colours to your garden. The wild ones require a very little care and maintenance hence they are super easy to grow. Here are a few simple steps to grow mushrooms in pots or in a garden.

  • The first step is to gather growing media for your mushrooms. They easily grow on manures, straw of rice or wheat and sawdust. Add any one of it to a pot of your choice.
  • Get some mushroom spawns and plant them like seeds in the media.
  • Keep the pot in dark until the mushrooms sprout.
  • Water them by misting once or twice a day.
  • After 7 – 10 days mushrooms will be grown and ready for you to show off.
  • Pink mycena, Phlogiotis helvelloides, Ramaria sp. are some of the species which you can grow in your garden.

Mushrooms decay in around 2 – 3 weeks. So, by then you can have your next batch ready for replacement.

Happy mushrooming folks!

Written by
Antra Thada